CAN Bus Sniffer - Reverse Engineer Your Vehicle Data

Need to 'reverse engineer' CAN data from your vehicle?
In this intro we explain how to hack your car/truck/machine to decode proprietary CAN data, letting you convert the raw CAN bytes to physical values.
In contrast to most guides, we'll make this practical and replicable with outset in our CANsub CAN bus interface and our free software tools.
In particular, we will cover when to use the CANsub's powerful webCAN GUI vs. the popular CAN sniffer tool SavvyCAN.
Note: See also our AI CAN sniffer intro - this is now our recommended workflow!
With the CANsub CAN-USB/Ethernet interface, you can stream CAN bus data from any CAN based application: Automotives (cars, trucks, motorcycles, ...), ships, machines and more. Below we take outset in the case of streaming from a car.
Streaming raw CAN data can look as below:
- Connect the CANsub to your CAN bus via e.g. our OBD2-DB9
- Connect the CANsub to your PC via USB
- Open the webCAN software directly in your browser
- Auto-detect the bit-rate and click connect to start streaming
- Optionally load DBC files to enable decoding/visualization
For details, see the CANsub product page.

Top 4 benefits of CAN bus reverse engineering
Using the CANsub with webCAN and SavvyCAN for reverse engineering CAN data offers key benefits:

Decoding of proprietary data
The most common purpose of 'CAN bus hacking' is to enable the decoding of proprietary CAN IDs to be able to analyze data from e.g. cars, trucks, machinery, etc

Extension of DBC databases
Often, you may have a partially complete CAN database (DBC) - here, a CAN bus decoder tool can help reverse engineer the missing CAN messages and signals

New use cases get unlocked
In many use cases, being able to reverse engineer just 1-5 parameters can be make-or-break, e.g. being able to log state of charge (SoC) from electric vehicles

Asset control via commands
A key benefit from reverse engineering raw CAN data (as opposed to e.g. OBD2) is to enable 'control' of e.g. vehicles via commands (e.g. to toggle lights, locks, ...)
Unsure if your use case would benefit from reverse engineering? Reach out for free sparring!
Contact usAI CAN sniffer intro
Before you proceed, we strongly recommend that you also check out our new AI CAN sniffer intro. The article shows you how to use our CANsub, python-can and a Claude Code skill to reverse engineer CAN signals using 95%+ less time.
We still recommend reading the 'classical' methodology of this article as a primer - but for any serious CAN reverse engineering use cases, we recommend the new AI CAN sniffer workflow.
learn moreHow to reverse engineer vehicle CAN bus data
Below we outline our recommended step-by-step guide for how to approach most CAN bus reverse engineering projects. We cover our suggested CAN tools in the next sections.


1: Decide target CAN signal & type
Pick a specific signal to extract, e.g. battery state of charge (SoC), engine RPM, vehicle speed, door-lock state or wiper position. We normally estimate 1-5 hours of work per CAN signal depending on your expertise. Next, classify the target along two dimensions:
- Stationary vs. driving: Stationary signals can be reproduced while parked (door locks, wipers, button presses, fan-speed knob, AC settings, manual gauges). Driving signals normally require real operation (speed, RPM, SoC, GPS, ambient temperature)
- Discrete vs. continuous: Discrete signals take one of a small set of states (door lock, gear position). Continuous signals vary smoothly over a range (speed, SoC)
The dimensions are independent and may affect how you approach some steps below.
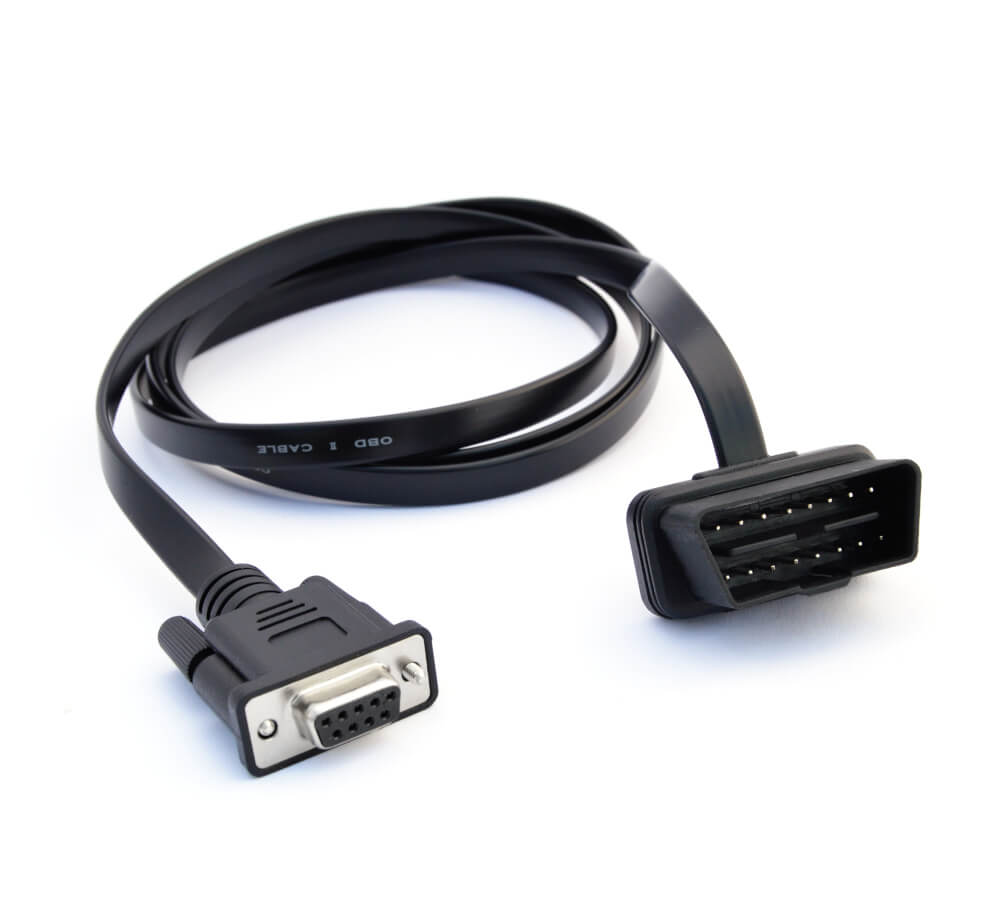
2: Select adapter cable
The relevant adapter cable depends on the CAN bus application. In most cars, for example, you'd use an OBD2-DB9 adapter cable while in most trucks it would be a J1939-DB9 (Deutsch) adapter. Such adapter cables also enable you to transmit data into the CAN bus, in case this is relevant to your CAN sniffing project (e.g. to request data via OBD2/UDS or attempt to control certain behavior via CAN frames).
However, in some cases the standard/common adapters are not suitable. For example, many modern cars do not provide any proprietary CAN access via the OBD2 adapter due to OEM gateways that e.g. only allow OBD2 requests. Similarly, some heavy-duty vehicles may use more niche connectors for which you are unable to find/create a suitable adapter cable.
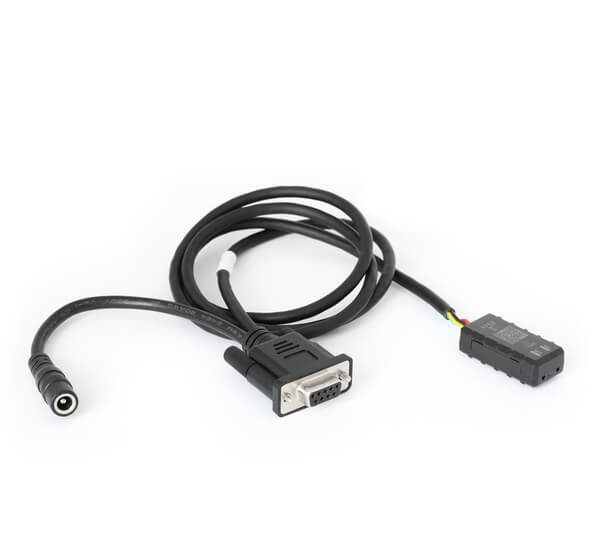
For such scenarios, the recommended solution is to use a contactless CAN reader to record data directly from the CAN high/low wires. Note, however, that this requires that you can find the relevant wires - and you are limited to read-only access.
See our hardware overview for the full adapter cable range.

3: Determine bit-rate & connect
The CAN interface needs to know the CAN bus bit-rate before connecting. Some CAN sniffers auto-detect the bit-rate - and otherwise you can find common bit-rates below:
- Cars: Cars almost always use 500K via the OBD2 connector
- Trucks/tractors/ships/...: Typically 250K, sometimes 500K
- Industrial machinery: Can be much wider, e.g. from 50K to 1M


4: Compare real-world data vs. CAN data
With the interface connected, correlate real-world events with changes in the CAN data. The approach depends on whether the signal is stationary or driving (per step 1):
- Stationary signals: Stream raw CAN live while repeatedly manipulating the signal (open/close door, wipers on/off, turn gauge from 0 to max, ...) - look for CAN IDs where the data bytes change in sync with each action
- Driving signals: Drive a representative trip while a passenger logs the dashboard value (e.g. speed) with timestamps (use the PC time). In parallel, record the full raw timestamped CAN trace for offline comparison vs. the manual timeseries
From here, narrow the list of candidate CAN IDs down to one using suitable software tools (more on this in the next section). This is the hardest part of the exercise - like a needle-in-a-haystack search. See our end-user videos for pro tips & tricks.
As outlined, we stronghly recommend to check out our AI CAN sniffer intro. This shows how to use Claude Code and python-can to radically speed this up.

5: Identify CAN signal bit position & length
Same as step 4, now at the byte/bit level: Filter to the candidate CAN ID and review the data bytes to isolate which bytes/bits correlate with your signal.
CAN signals can in principle range from 1-32+ bits. In practice, conventions apply:
- Boolean signals usually consume 1-2 bits
- Continuous signals often use 1-2 bytes, unless they require high precision (e.g. GPS)
- OEMs often encode signals on clean borders (e.g. not splitting 8 bits across 2 bytes)

6: Identify scale & offset
Once you have identified the relevant bytes/bits, the next step is to convert the raw decimal value to a physical value as below (see also our intro to CAN bus):
The work depends heavily on signal type:
- Discrete: scale=1 and offset=0 is typically all you need. The raw decimal value is the state code itself (e.g. 0 = unlocked, 1 = locked)
- Continuous: Most of the scale/offset work happens here. Plot the raw decimal signal vs. your timestamped reference and iterate scale, then offset, until the curves overlap. A trip with a smooth MIN-to-MAX transition makes this easier
Tip: If your parameter has an OBD2 equivalent (RPM, speed, ...), logging OBD2 data in parallel gives you an extra reference for faster analysis.

7: Add as entry in DBC
Finalise the signal as an entry in a CAN database (DBC file) with bit position, length, scale, offset and (optionally) min/max values. Use our free online DBC editor or any other DBC editor. This lets you easily decode your data in most CAN bus software tools.

8: Transmit for requests & control
Some use cases involve transmitting frames onto the bus:
- Request data: Some CAN signals are only available on-request (e.g. OBD2/UDS PIDs). To capture these, actively send the right request frame and watch for the response
- Control behaviour: Test whether a specific frame triggers an action (e.g. door unlock, horn, wipers) by 'spoofing'/simulating the frames an ECU would normally send
You should only transmit on a live CAN bus if you know what you're doing. Sniffing for visualisation is one thing - pushing frames to actively request data, control or impersonate ECUs is fundamentally different and potentially dangerous. Test on a bench setup or sacrificial vehicle first, never on a vehicle in motion.
This is generally harder than broadcast messages because it's a two-step problem:
- Trigger the response: Test different request frames until the ECU starts responding - with different CAN ID, payload and e.g. ISO-TP permutations
- Reverse engineer the response: Once a request triggers a response, apply the workflow from steps 4-7 above
Step 1 is tackled systematically by sweeping the request space and watching for response activity. The SavvyCAN fuzzing tool covered further below is one example.
Controlling a vehicle by impersonating another ECU is most feasible for non-continuous, one-shot commands: Door unlocks, horn blasts or wiper toggles can often be triggered by injecting a single frame (or short burst) at the right moment.
Continuous signals are harder. The real ECU is potentially already broadcasting at high frequency, so frames you inject to overwrite e.g. dashboard speed or RPM interleave with the originals on the bus - usually causing spurious or unstable behaviour. Silencing the source ECU is sometimes the only fix, but rarely practical.
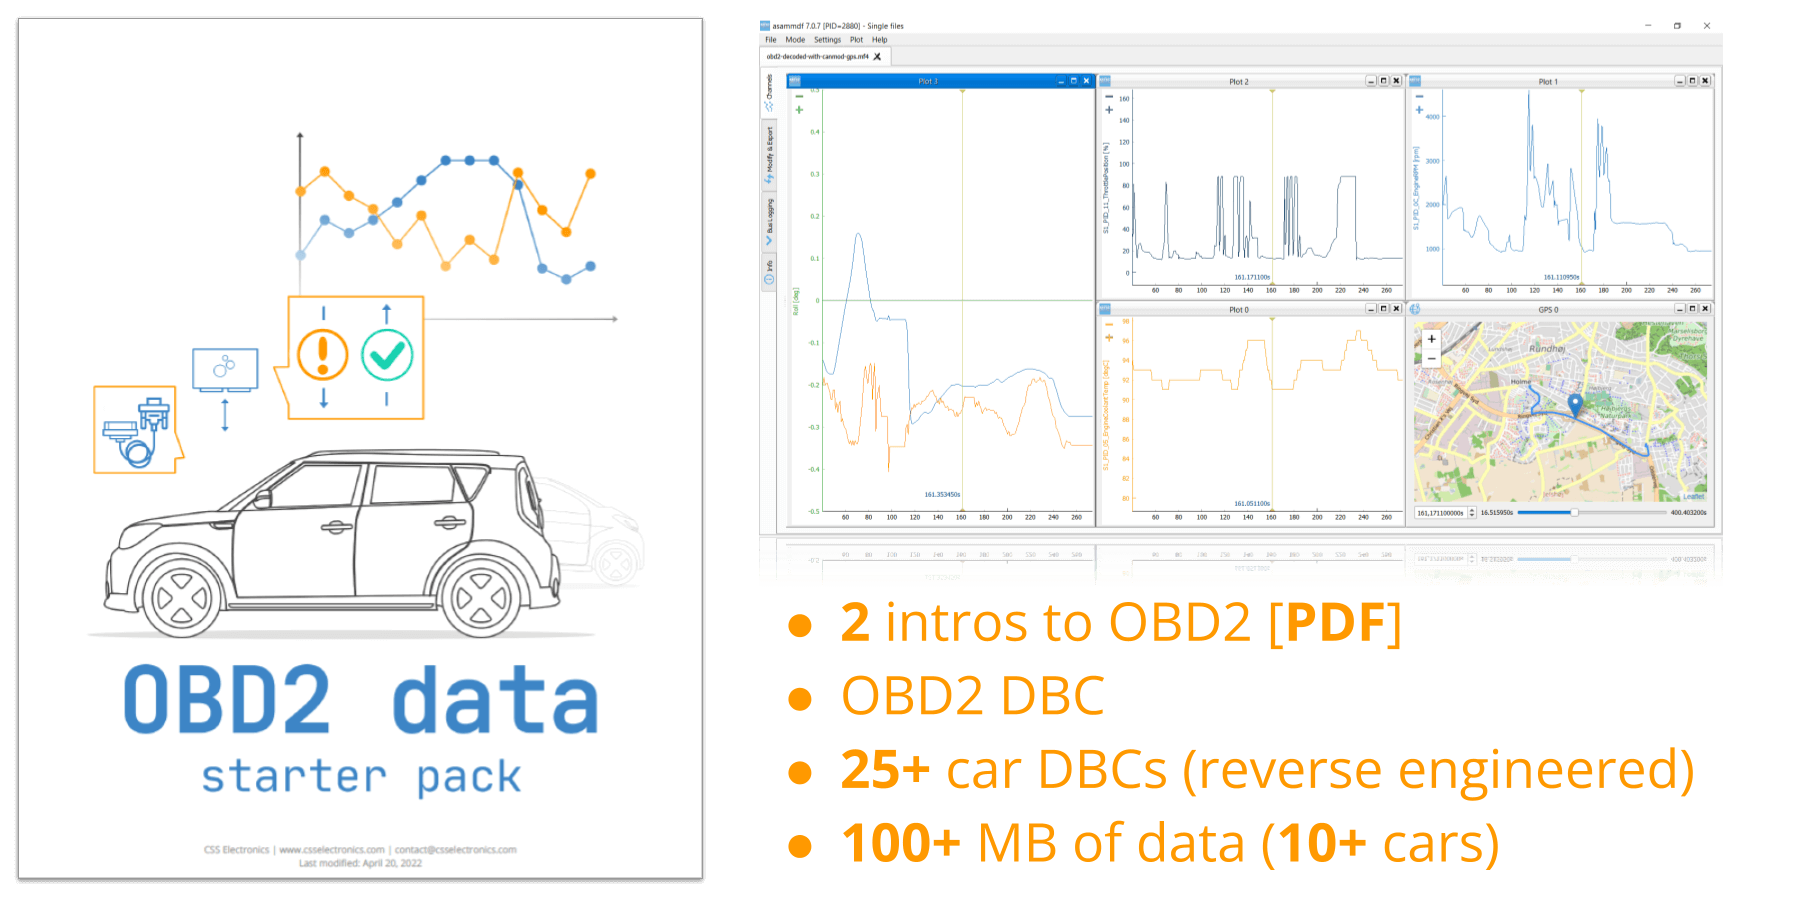
Get the 'OBD2 Data Pack'
Want to try working with real OBD2 data?
Download your 'data pack' including:
- Our OBD2 DBC
- 25+ car DBCs (reverse engineered)
- 100+ MB of data from 10+ cars
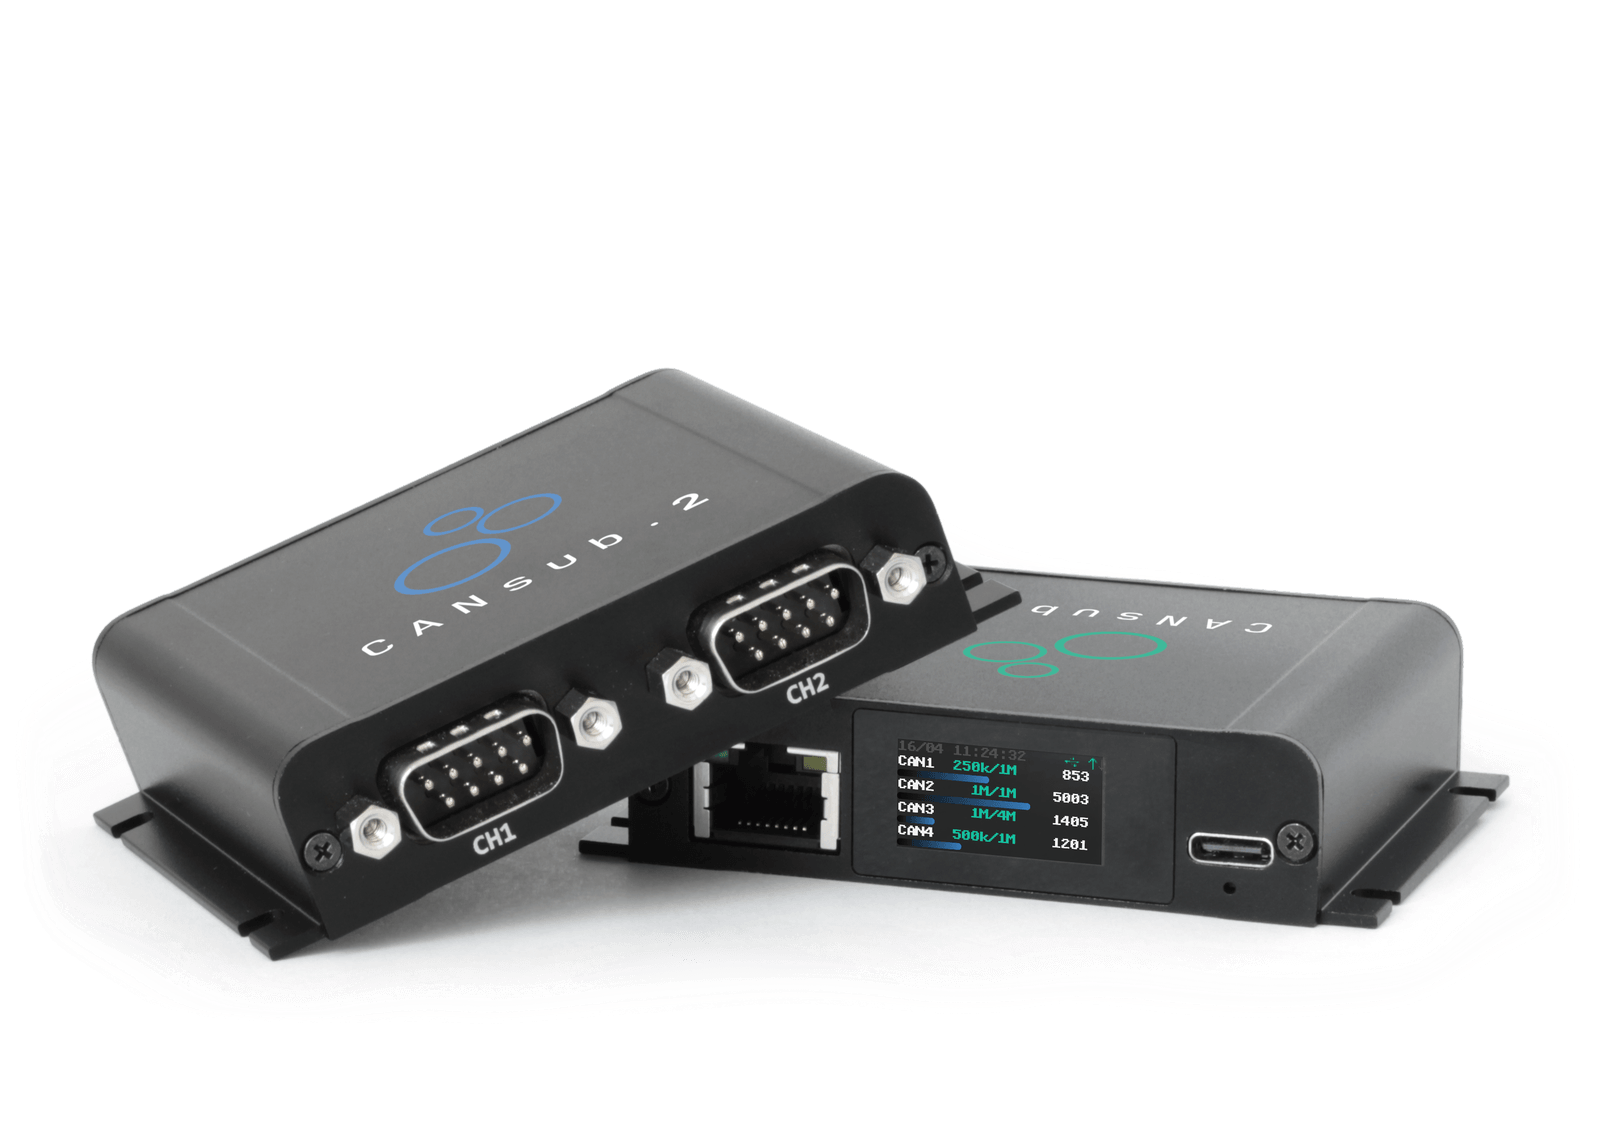
CANsub.2 - the perfect CAN sniffer
The CANsub.2 is our 2 x CAN bus streaming interface via USB/Ethernet and the built-in webCAN app:
 ZERO INSTALL
Power via USB. Enter device URL to open webCAN. Start sniffing CAN data in your browser
Only 8 x 7 x 2 CM. 90G. Aluminium enclosure. Built-in LCD display for device status
 PRO SPECS
2 x CAN FD. Galvanic isolation. 20K+ frames/s. 1 µs timestamps. Error frames. Silent mode
Runs on device. Configure, stream, DBC decode, plot signals - and reverse engineer
USB for direct CAN access via laptop. Ethernet for network, WiFi and remote use. HTTPS
 INTEROPERABLE
Easily integrate with Python, SavvyCAN, dashboards, custom apps, ...
CAN bus reverse engineering with the CANsub.2 & webCAN
In this section we explain how the CANsub.2 can be used for CAN bus reverse engineering linked to our step-by-step process above.
2: Select CANsub adapter cable(s)
The CANsub.2 uses standard DB9 connectors, so they plug straight into our OBD2-DB9, J1939-DB9 (Deutsch) and other adapter cables. For OEM-locked OBD2 ports, the contactless CAN reader (CH1) also outputs to DB9 and pairs with the CANsub for passive sniffing. You can power the contactless CAN reader with our DC-receptacle adapter.
Tip: We recommend getting both types of cables (standard connector + contactless). This enables you to leverage the 2 x CAN channels of the CANsub - e.g. to request OBD2 data from CAN1 while you sniff proprietary CAN data on CAN2, enabling you to correlate comparable signals like speed, RPM etc.

3: Auto-detect the bit-rate + connect
Next, connect your CANsub.2 via USB to your PC and check the LCD dipslay for the device URL. Enter this in your browser to instantly start webCAN - zero installation required.
webCAN lets you auto-detect the CAN bus bit-rate by cycling standard rates and locking onto the first valid frames.
If this fails, it is with 95% certainty because no broadcast CAN data is available on the bus (e.g. due to an OEM gateway block). In such a case you can attempt to use a contactless reader.
Once connected, you can review all unique CAN frames via the summary view - or all historical frames via the trace view.
4: Isolate CAN ID (webCAN/Python/AI)
The webCAN summary view 'fade' mode will grey out inactive data bytes - letting you quickly spot which bytes respond to your physical actions. You can combine this with the filter panel to quickly slim the candidate list down. Ideal for 'stationary' signals.
For 'driving' type signals you can leverage the trace view, which automatically stores up to the 2,000,000 raw CAN frames in a cyclic buffer. Most vehicles will exhibit 500-1000 frames/second, meaning 2M frames = 30-60 min of data (ususally sufficent). If you need longer trips, simply use webCAN to deploy 'device filters' on the CANsub to reduce the inflow of CAN data into webCAN, boosting the buffer's trip duration to several hours.
The buffered data can be exported to CSV for analysis via e.g. Python or Excel - and it can be re-imported into webCAN for later analysis and DBC decoding.
You can set up OBD2 request transmit lists on e.g. CAN1 using the 'DBC encoder' functionality and our OBD2 DBC file. Combine this with proprietary CAN data on CAN2 to have both perfectly timesynced at 1 µs resolution in the resulting trace file for correlation analysis. This is what we refer to as a 'CAN based signal reference' in our AI CAN bus reverse engineering intro.
You can also set up custom transmit lists with 'event tags', i.e. CAN frames you inject into the bus (and thus your trace) to serve as event tags for subsequent analysis. You can even prepare multiple frames with e.g. different data bytes to reflect different observed real-world values (e.g. speed = 20 km/h, speed = 40 km/h, ...) and use the space bar keyboard shortcut to trigger these during trips.
In our AI CAN bus sniffer intro we show how you can provide such 'external' reference signals more effectively using e.g. vision-based methodology (essentially filming your car's dashboard display and using Optical Character Recognition) as well as human-based inputs via tailor-made apps.
As outlined in the intro, signals that require driving a vehicle can be hard to reverse engineer as they rely on detailed analysis of potentially millions of raw CAN frames. A useful tool in this regard can be to use Python scripts to assist in identifying patterns and correlations. This is particularly useful if you have enriched your raw trace with event markers - either through manual data transmissions (as per the above tip) or via correlated signals (e.g. if you have an OBD2 speed signal as reference for a proprietary speed signal).
Python can be a complex and time-consuming tool to use in this regard. However, with the rise of LLM/AI assistants like Claude Code, you can now much more leverage automation routines in your reverse engineering efforts. In particular, you can guide e.g. Claude Code to use the command line 'cantools' package, based on python-can, to allow your LLM assistant to access the CANsub for real-time CAN streaming. Or, you can provide it with access to the CSV trace exported from webCAN to run analyses based on that.
You can learn more about these workflows in our new AI CAN sniffer intro.
Export the raw/decoded trace to CSV - re-import later for DBC analysis
Use SavvyCAN's bit-level sniffer to isolate which bits change with each action
Or use the range-state view to test bit hypotheses against reference data
5: Identify bit start/length
For stationary signals, you can use the summary 'fade' view to quickly identify which bytes appear to respond to your changes. If the signal is a stationary discrete type signal, you may also want to connect your CANsub with SavvyCAN to leverage the specialized bit-level sniffer view to isolate the exact bits that correlate with your changes.
For driving-type signals you can leverage some of the same techniques as outlined for isolating the CAN ID when isolating the relevant payload bits. Further, you may want to leverage SavvyCAN's 'range state' view to quickly batch-test your hypotheses on potential signal encodings. As with CAN ID isolation, Python + LLM/AI tools is also an extremely useful tool in determining which bytes correlate with the real-world reference data, in particular if you can provide reference 'boundaries' in the form of the expected unit and timestamped absolute physcial values.
6: Validate scale & offset
Once you've identified your candidate CAN ID, bit start and length, you may benefit from creating a draft DBC file with the encoded signals and placeholder scale/offset values. As explained, for discrete signals this may already be the end result.
For continuous signals, you need to identify the scale/offset values for your DBC. For this purpose you can load your draft DBC in webCAN and re-import your raw CSV trace. This lets you re-decode the CSV data and e.g. plot your draft-DBC decoded signal visually against e.g. a reference signal (such as an OBD2 PID) or e.g. your injected TX data. You can flexibly plot multiple signals in the same or separate panels for evaluation.
To prototype new DBC files, you can e.g. use our DBC editor or the Python-based cantools DBC creation tools.
7: Update your DBC & test it
Edit your DBC and reload it in webCAN - the imported CSV re-decodes in place, so you can validate new encoding rules against historical data without re-recording. The same applies to transport protocol rules: ISO-TP, J1939 TP and NMEA 2000 Fast Packets reassemble across the buffer for multi-frame payloads like UDS responses or EV battery snapshots.
Once validated you can also test out your DBC on new CAN data in real-time via webCAN and e.g. visualize the data in plots!
8: Transmit, request & fuzz
You can quickly build transmit sequences in webCAN, either by directly entering raw CAN frames - or by using the DBC encoder tool. The jobs can be deployed on the device for precise 10 µs scheduling precision - ideal for OBD2/UDS/J1939/XCP requests. Further, you can also use the transmit functionality creatively to inject 'reference markers' into your data as outlined previously.
The webCAN transmit messages can also be fired manually as 'single shots' via the space bar, ideal for e.g. simulating discrete signals like door locks or wipers.
If you need to investigate how a vehicle ECU might respond to certain frames you can use SavvyCAN's fuzzing tool.
Learn from CAN bus reverse engineering experts
Below are expert community tutorials that walk through real CAN bus reverse engineering projects using our hardware:
Dan Dulac (part 1)
Dan Dulac (part 2)
Couchbuilt
Iamcarhacker
The community tutorials above were recorded with our older CLX000 (CL1000/CL2000) and CANmod.router devices, which were our primary streaming interfaces at the time. The methodology and software workflows shown in the videos remain 100% applicable - what changes is the hardware/software tools we recommend.
For modern reverse engineering work we strongly recommend the CANsub.2 instead: It offers 2 x CAN FD channels, 20,000+ frames/second, 1 µs timestamps, the zero-install webCAN app and Ethernet access. The CANsub integrates natively with SavvyCAN, so any SavvyCAN-based workflow you see in these videos transfers across directly. See the FAQ below for a full CANsub vs. CLX000 comparison.
FAQ
We offer free, fast and high-quality technical support on our hardware and software - bit-rate settings, adapter cable choice, webCAN/SavvyCAN/Python questions, transmit list setup, DBC file handling and similar topics. Just contact us.
However, we do not offer support on the reverse engineering exercise itself, i.e. we cannot help you identify which CAN ID, bit position, scale or offset corresponds to a specific signal on your vehicle. Most of the practical expertise our team has on this topic is already documented in this article - and the customer videos further below show experienced end users walking through real reverse engineering projects step-by-step.
The CLX000 family (CL1000/CL2000) was our first generation low-cost CAN logger and interface, and it served as the workhorse hardware behind most of the community reverse engineering tutorials online. The CANsub is our dedicated modern streaming interface, purpose-built for sniffing and reverse engineering:
- Channels: 2-4 x CAN FD vs. 1 x classical CAN on the CLX000
- Throughput: 20,000+ frames/second vs. ~1,000 frames/second
- Timestamp resolution: 1 µs vs. 1000 µs (1 ms)
- CAN FD: Supported (up to 5 Mbit/s data phase) vs. not supported
- GUI: Zero-install webCAN runs in the browser, plus native SavvyCAN/Python integration
- Connectivity: USB + Ethernet (LAN, WiFi, LTE/VPN) vs. USB only
- Display: Built-in LCD shows device URL, bit-rates, busloads, errors and frames/second
- Integration: OpenAPI + websockets + JS/TS libraries for custom web apps
If your sniffing needs fit on a single classical CAN channel at sub-1000 frames/s, the CLX000 still works. For everything else (CAN FD, multi-channel buses, modern OBD2/UDS work, remote setups, fast-evolving ECU diagnostics) the CANsub is the right choice.
Some online blogs and examples of automotive hacks use Arduino modules and CAN bus shields to build low cost CAN bus decoders. In particular, this may appeal to hobbyists familiar with Arduino boards. Similarly, various Raspberry Pi modules with CAN bus modifications exist that can serve as CAN bus sniffers. There are even examples of ELM327 modules being used for CAN sniffing.
These modules are versatile, but they are not designed specifically as CAN bus interfaces. The CANsub offers a much stronger alternative for reverse engineering:
- Plug & play with 100% free software tools (webCAN, SavvyCAN, Python), so you spend time on the bus rather than on toolchain setup
- Configurable hardware ID filters and silent mode let you focus on the CAN frames of interest
- CAN FD support, 20,000+ frames/second and 1 µs timestamps - well beyond what Arduino CAN shields can sustain
- Both raw and DBC decoded data are streamed straight into a user-friendly browser GUI (webCAN), with SavvyCAN as the specialist companion
- The CANsub is also a real CAN-USB interface for transmit/playback workflows (custom frames, fuzzing, log replay) at edge-based timing precision
- Free, fast and high-quality support from CSS Electronics if you get stuck
- The total cost (hardware + time-to-get-started) is typically lower than an Arduino/Pi build once you factor in the integration work
If you are in doubt what solution is best for you, please contact us.
See Step 8 for the general transmit methodology (request vs. control, warnings, on-request reverse engineering, spoofing limits). The CANsub supports both workflows through two complementary tools:
- webCAN transmit sequences: Define multi-frame transmit sequences per CAN channel with custom period, inter-frame spacing and count limit. The DBC encoder lets you type physical signal values (incl. PGN/multiplexing) and get a fully encoded frame back. Sequences are deployed on the device for 10 µs scheduling precision, which is well-suited to OBD2/UDS/J1939/XCP request schedules
- SavvyCAN fuzzing and live transmit: Push crafted frames in real-time with full control over ID, payload and frequency, or run controlled fuzzing where payload bits are randomised within configurable bounds (useful for the 'trigger the response' step of on-request reverse engineering)
Originally, the CLX000 integrated with Wireshark and we developed a set of useful features for CAN reverse engineering on that stack. The integration is still supported, but for modern work we recommend webCAN (browser-based, zero install) with SavvyCAN as the specialist companion. Below is a snapshot of the original Wireshark workflow for historical reference.
In the following, we illustrate how to perform reverse engineering steps #1 and #2 using the CLX000 in Wireshark.
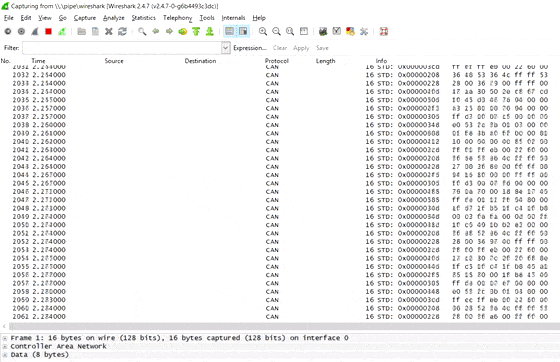
Streaming raw CAN data
When you first start streaming raw CAN data with the CLX000, you will get a lot of CAN packets on your screen.
Wireshark provides multiple tools for analyzing this view (filters, column configuration, plots) - but none of them are ideal for the initial reverse engineering efforts.

Using the 'CAN Live' feature
Instead, we recommend using the CAN Live Wireshark plugin, which lets you show a 'trace' of your data.
To open this, click Statistics/CAN Live IDs when streaming to bring up the trace window. As evident, this view shows one row for each CAN ID, providing a great overview for CAN hacking.
When a CAN bus data byte changes, it is coloured blue and the colour fades as the byte stays constant. This provides immediate visual feedback when comparing raw CAN bus data patterns vs. physical events (e.g. turning on the car wipers). In practice, this helps turn Wireshark into a powerful CAN bus decoder software tool.
Ready to reverse engineer your CAN data?
Get your CANsub today!


