Guide: Streaming & Firmware USB Installation
This guide outlines how to install USB drivers for streaming real-time data and updating the CLX000 firmware.
Note that the drivers are typically automatically installed. But in case you experience problems, the below guide should help.
1# STREAMING: USB 'SERIAL INTERFACE' DRIVER
This section shows how to install USB drivers for streaming real-time data via SavvyCAN with a CLX000.
To enable the CLX000 interface mode, follow the sequence below:
- Power the logger from the DB9 connector
- Wait for the logger to boot
- Connect a USB cable from the logger to a PC
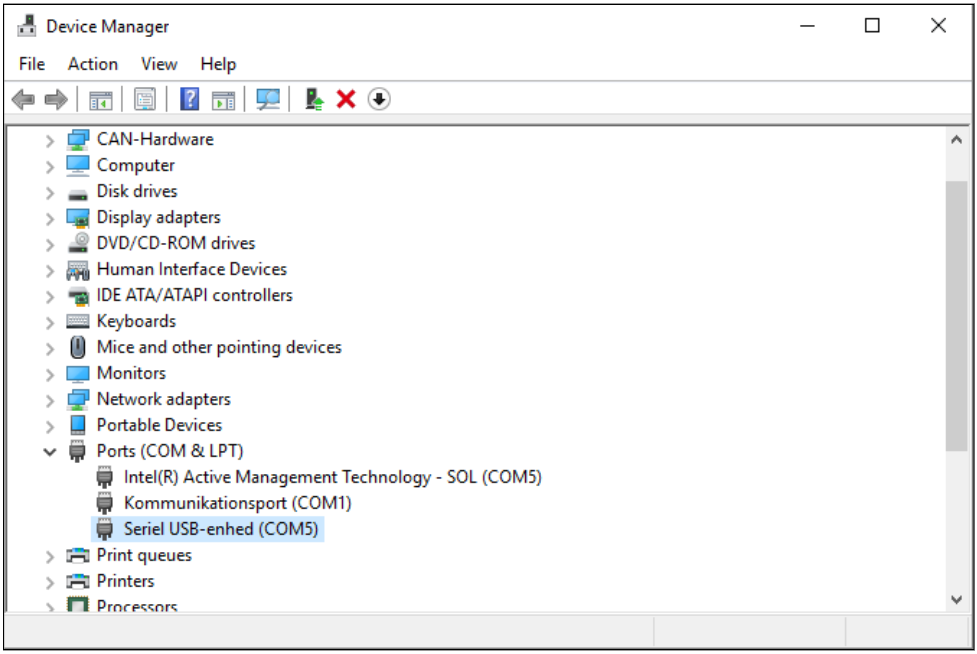
In interface mode, the CLX000 presents itself as a USB virtual serial port and should show up in Windows Device Manager. This typically happens automatically as the USB drivers will be auto-installed on most Windows/Linux systems. If the driver auto-install is successful, the device shows up as below:
INSTALLING THE USB INTERFACE DRIVER
If the driver is not auto-installed, the device is often listed in "Other devices" in Windows Device Manager (cf. below):
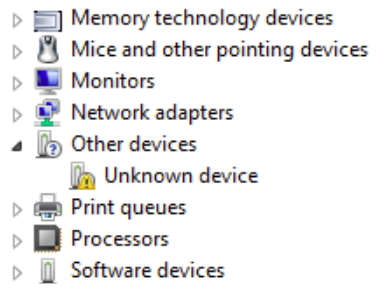
In this case the driver needs to be manually installed.
This requires that you download the USB drivers from here.
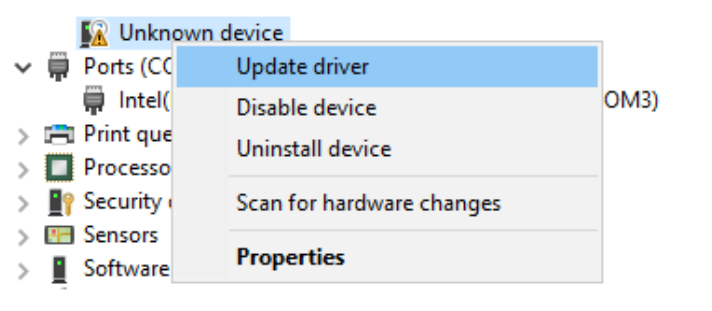
Next, right-click the "Unknown device" and select "Update driver" as below:
Follow the install wizard: First, choose to "Browse my computer for driver software" and then navigate to the 'windows_drivers/cdc' folder in the extracted zip from our Downloads page.
! Make sure that the "Unknown device" is in fact the CLX000. This can be done by connecting / disconnecting the device and monitoring the changes in the Device Monitor view
! Remember that to install the streaming USB driver, you need the CLX000 enter streaming mode as outlined above
Note: Some users find that a slightly different method works (e.g. on some Windows 7 PCs):
- Select the option to choose from already installed drivers
- Do not directly browse to the 'windows_drivers/cdc' folder
- Instead choose the option to select from already installed drivers and click the "Have Disk..." button
- Now navigate to the 'windows_drivers/cdc' folder and select the file 'usb_dev_serial.inf'
Note: On some Win7 PCs the previous USB drivers are required - you can try these out here.
DRIVER INSTALLATION ON WINDOWS 10
Sometimes Windows 10 refuses to install drivers using Windows 7 style driver certificates. This can result in confusing error messages such as "No driver found", "Invalid driver hash" etc.
This is due to the new "Windows 10 Driver Signature Enforcement" service used by Windows to block unknown drivers.
The enforcement can be temporarily disabled to allow manual install of drivers:
- Hold the "Shift" key while you click the "Restart" option in Windows
- The PC will restart into a menu. Select "Troubleshoot" -> "Advanced options" -> "Startup Settings" -> "Restart"
- In the "Startup Settings screen", select option 7 / F7 to start Windows without driver signature enforcement
By following the above, Windows boots with the enforcement disabled, allowing manual installation of the driver.
Note that the driver enforcement will be enabled the next time the PC is restarted.
Next, simply follow the steps in the previous section to manually install the driver.
2# FIRMWARE UPDATE: USB 'DFU' DRIVER
In this section we outline how to install the device Firmware upgrade driver, if required
To put the logger in DFU mode, follow the below steps (cf. also the device manual):
- Make sure that device is powered completely off
- Gently push and hold the DFU button, as illustrated in Figure 9
- Connect the USB cable to the PC to power on the device
- The device powers on and enters DFU mode (red LED on, green & yellow off)
- Release the DFU button
Following the above steps should make the logger appear under the "Safely Remove Hardware and Eject Media" tab as below:

If the device does appear, you can follow the regular steps to update Firmware.
The simplest method is to use CANvas' "UPDATE FIRMWARE" tab and follow the guidance from there.
In case the device does not appear, install the Firmware Driver via below steps:
- Open Device Manager and locate the CLX000 port (it should be visible by default after opening)
- Right click the device and choose to install/update the driver software
- Navigate to the "dfu" folder (get the driver here)
- Choose to open the "dfu" folder in the browser
You should now be able to see the logger as outlined above in the "Safely Remove Hardware and Eject Media" tab.
If not, try restarting your PC and re-connect the CLX000 in DFU mode.
! Note: On Windows 10, you may encounter a challenge with installing the Firmware Update driver. If so, please follow the steps in the above section 'DRIVER INSTALLATION ON WINDOWS 10' and retry
If you're still experiencing problems, please contact us.